

At a glance
Two deployment modes.
- Full Zendesk integration (Fini replies on incoming Zendesk tickets and chats): the entire page below applies, including Agent Routing and Reply Settings.
- Widget-only deployment (Zendesk is just a destination where the Fini widget escalates conversations): authorize the OAuth connection on this page, then configure the escalation brand and channel under Widget → Escalate to Zendesk instead. You can skip Agent Routing and Reply Settings here.
Before you connect
You’ll need:- A Zendesk admin account for the workspace you want to connect (non-admin users can’t authorize the integration).
- Your Zendesk subdomain. For example, if your Zendesk URL is
https://acme.zendesk.com, your subdomain isacme. - At least one agent already created in Fini. If you haven’t created one yet, do that first from Agent home.
Fini supports Zendesk’s multi-brand setup. If your Zendesk has multiple brands, you can map a different Fini agent to each brand. If you only have one brand, the same agent will respond across all incoming traffic.
What Fini does with your Zendesk
When you authorize the integration, Fini requests theread and write OAuth scopes on your Zendesk account. The full list of side effects performed during and after authorization:
- Read tickets and conversation messages: required so the agent can understand context and compose replies.
- Post replies on tickets: as the authorized user, when a mapped agent decides to respond.
- Create two custom ticket fields on your Zendesk account: one used to mark tickets the agent should skip, and one used to mark tickets that have been escalated. Existing fields with the same names are reused.
- Create webhooks and triggers that notify Fini when new messages arrive on email and messaging tickets, and when widget tickets are solved.
Connect Zendesk
When you first open the Zendesk deploy page, you’ll see the Connection Details panel asking for your subdomain: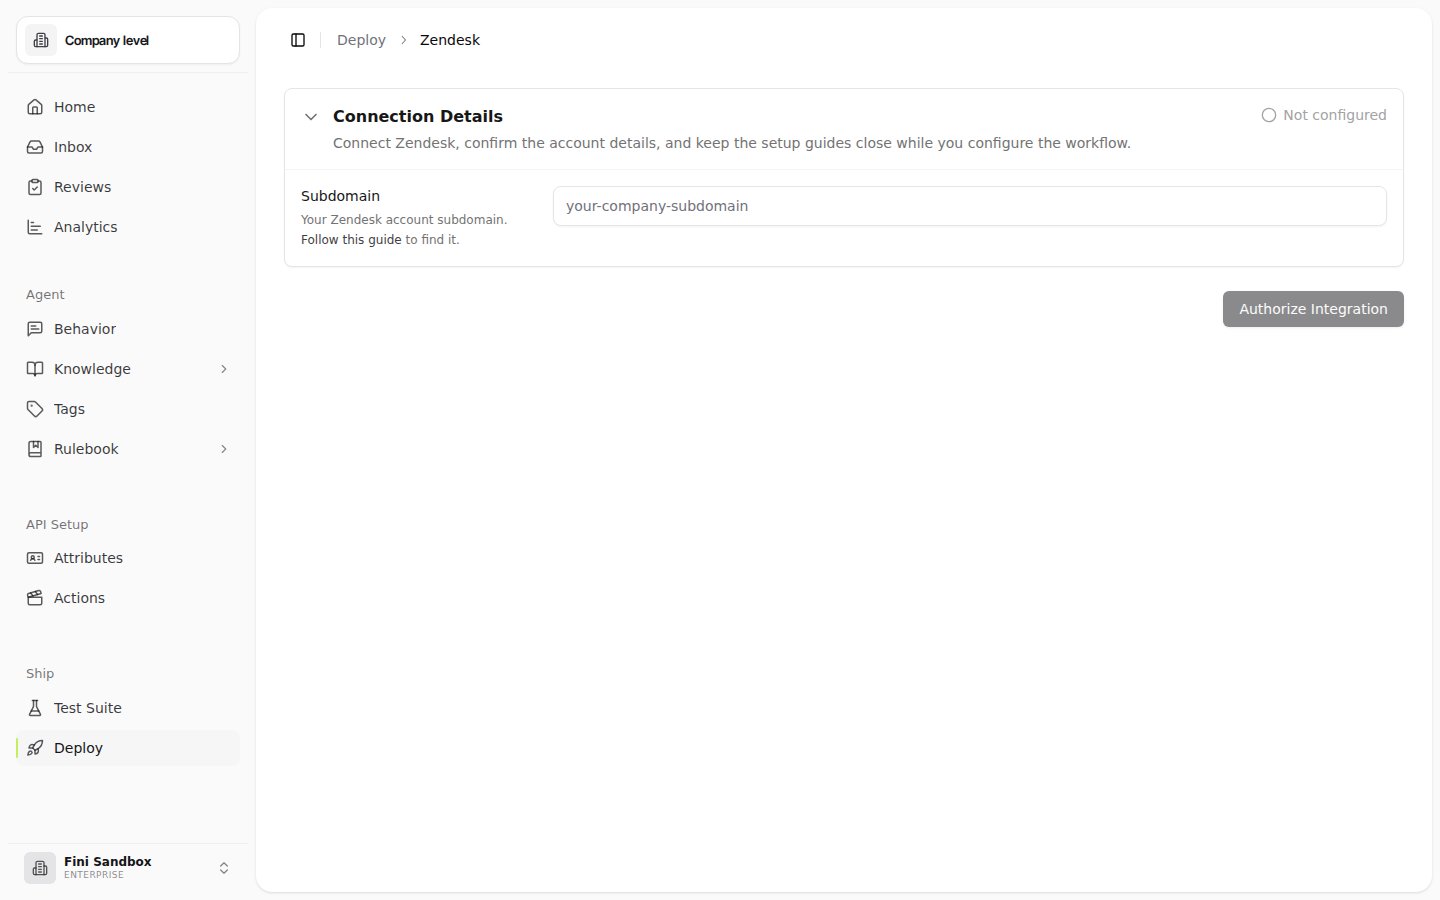
1
Enter your Zendesk subdomain
Type the subdomain portion of your Zendesk URL (e.g.,
acme for acme.zendesk.com) into the Subdomain field.2
Click Authorize Integration
A Zendesk login window opens. Sign in with your Zendesk admin account and approve the requested permissions.
3
Return to Fini
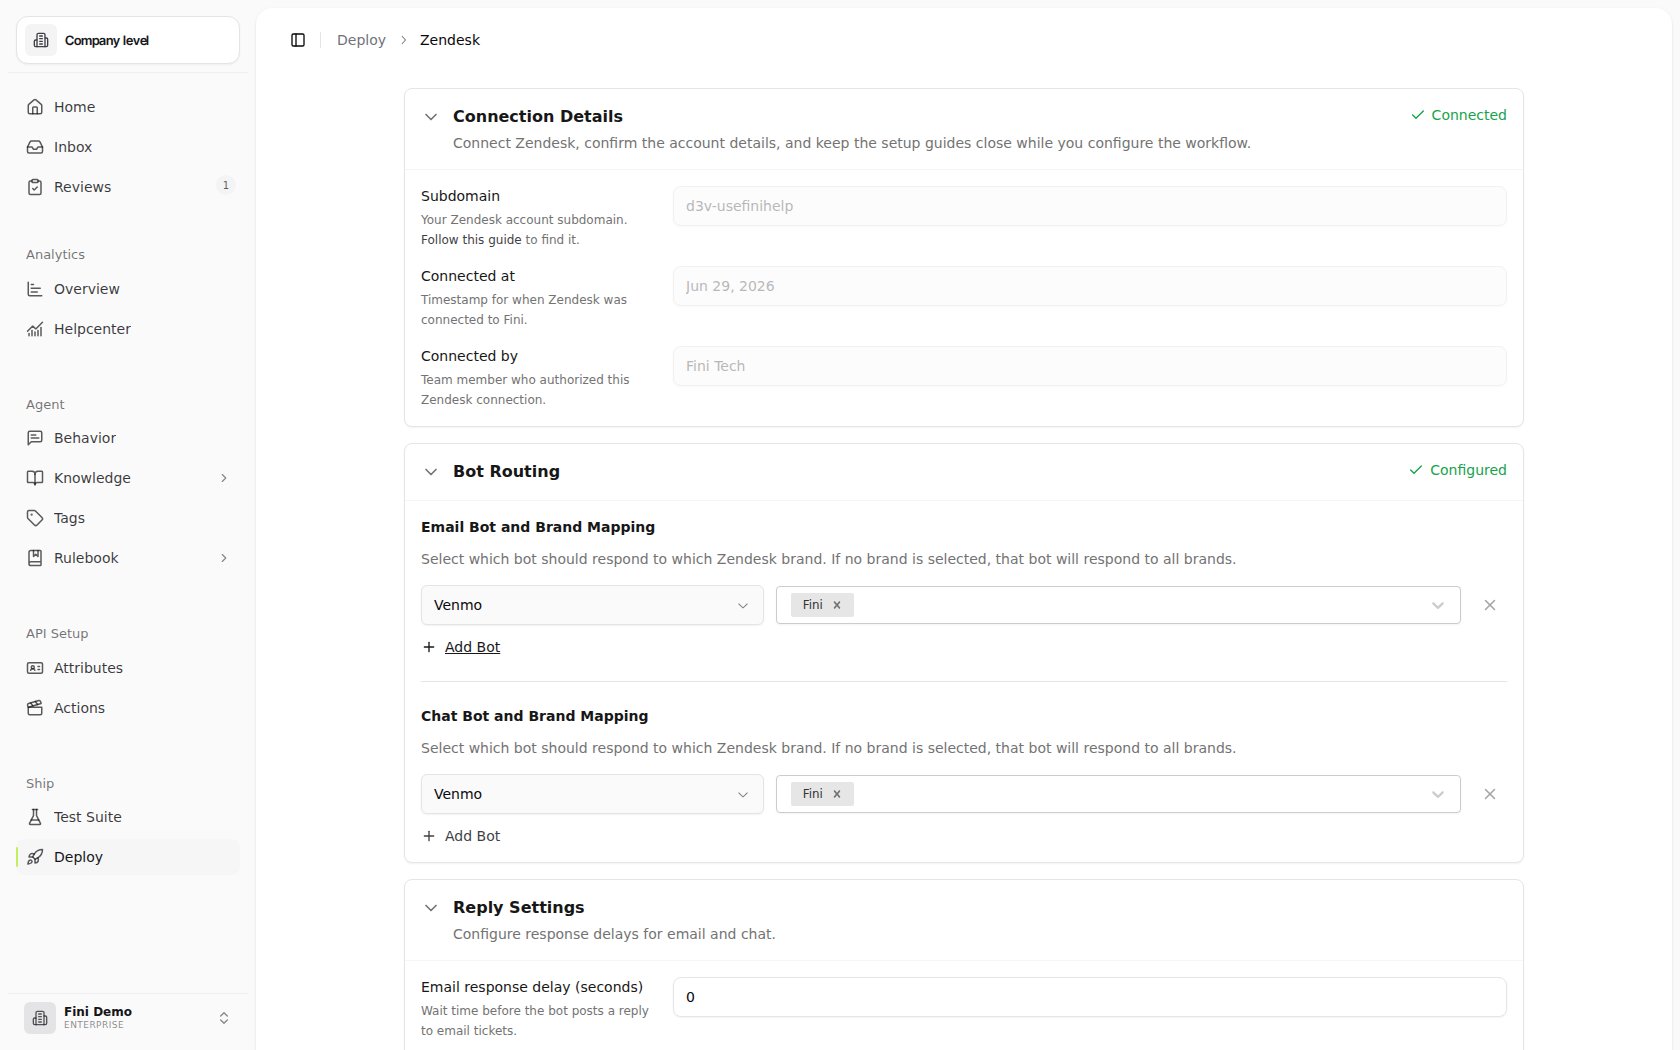
Once Zendesk redirects you back, the page expands to show the full configuration with your connection metadata.
Configure your deployment
After connecting, three sections appear on the Zendesk deploy page. Each is independent. You can configure them in any order.Connection Details
Read-only metadata about the integration:- Subdomain: the Zendesk subdomain Fini is connected to.
- Connected at: the timestamp of the most recent successful authorization.
- Connected by: the team member whose Zendesk admin account authorized the integration.
Bot Routing
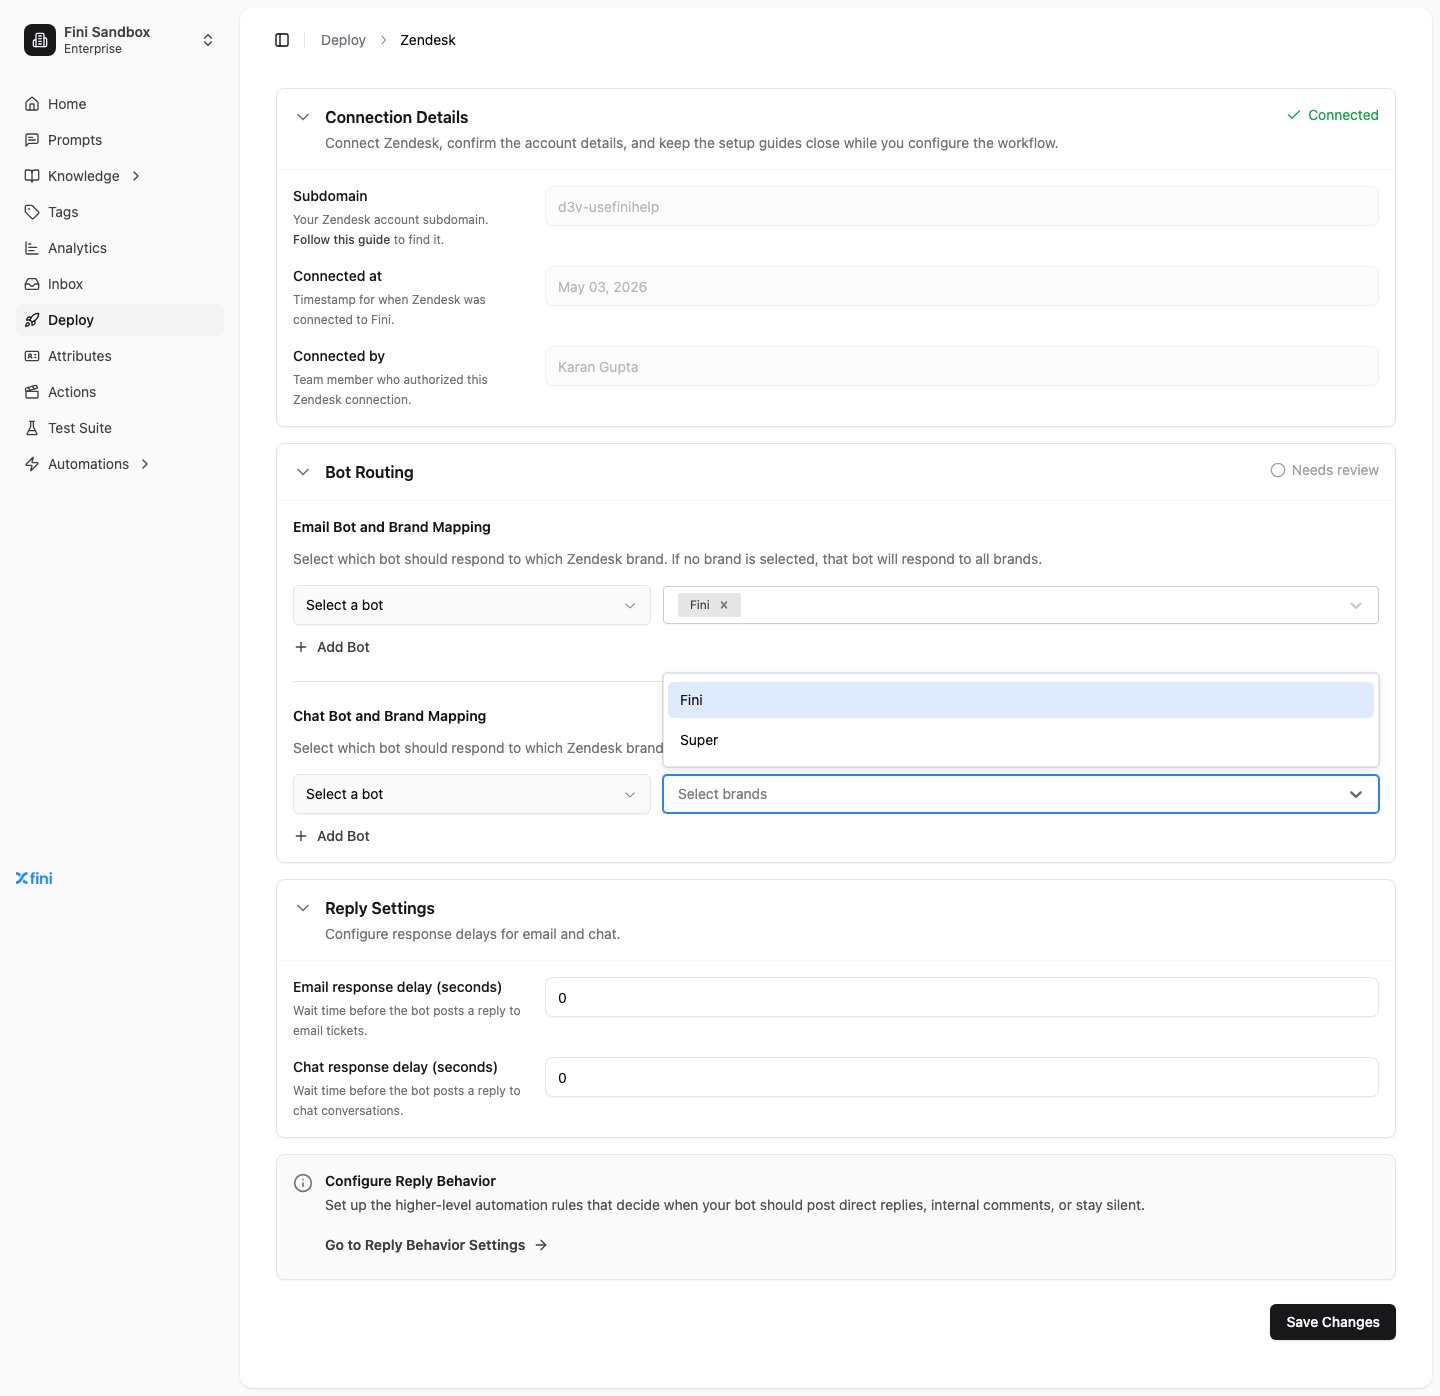
Decides which Fini bot replies on which Zendesk brand, separately for email tickets and chat conversations. For each channel (Email Bot and Brand Mapping, Chat Bot and Brand Mapping):- Click the bot dropdown and pick the Fini bot that should respond.
- Click Select brands and select the Zendesk brands that agent should respond to.
Reply Settings
Controls how long Fini waits before posting a reply.- Email response delay (seconds): wait time before the agent posts on email tickets.
- Chat response delay (seconds): wait time before the agent posts on chat conversations.
0 makes the agent reply as soon as it has an answer. Higher values can make the agent feel less robotic, or give human agents a chance to take over first.
Configure reply behavior
Reply Behavior is the higher-level rule layer that decides when the agent should post a direct reply, leave an internal note, or stay silent. Click Go to Reply Behavior Settings on the Zendesk page to configure these rules. They apply across all channels, not just Zendesk.Fini tags → Zendesk tags
The connected Zendesk page also exposes Fini tags → Zendesk tags. Use it to map Fini output tags to free-form Zendesk ticket tags so Zendesk views, triggers, and reporting can react to how Fini classified the conversation.Verify it’s working
- From your connected Zendesk account, send a test ticket to one of the brands you’ve mapped.
- Wait the configured response delay, then check the ticket. The mapped Fini agent should have posted a reply.
- If nothing appears, see Troubleshooting.
Common questions
Do I need to replace Zendesk or migrate my tickets?
Do I need to replace Zendesk or migrate my tickets?
No. Fini connects to your Zendesk account over OAuth and works on tickets where they already are. Your team keeps using Zendesk. See Fini on top of your helpdesk.
What does Fini do when it can't answer?
What does Fini do when it can't answer?
It escalates the ticket to your human team and sets the escalation field Fini created in Zendesk, so your team can find and route it in Zendesk.
Can I limit Fini to certain brands or channels?
Can I limit Fini to certain brands or channels?
Yes. Pick the brands for each bot under Email Bot and Brand Mapping and Chat Bot and Brand Mapping. An empty brand selector means every brand.
Will Fini reply while a human agent is working the conversation?
Will Fini reply while a human agent is working the conversation?
Not if you tell it not to. Add a No Reply rule in Reply Rules with Human Agent Assigned equal to
True. A higher response delay in Reply Settings also gives your team a chance to take over first.Can Fini leave internal notes instead of public replies?
Can Fini leave internal notes instead of public replies?
Yes. An Internal Comment rule in Reply Rules makes the agent post an Internal Note that only your team sees. To pause Fini on all Zendesk traffic, add a No Reply rule with Integration Provider equal to
zendesk.Troubleshooting
Authorization failed or expired. Click Authorize Integration again from the Zendesk deploy page. Make sure you’re signing in with a Zendesk admin account, not an agent account. The agent isn’t replying. Check, in order:- Is an agent mapped to the brand the ticket came in on? (Empty brand selector = “all brands”; an explicit brand list excludes everything else.)
- Is the agent enabled and trained?
- Is the response delay much higher than expected?
- Are there Reply Behavior rules that suppress replies on this channel or ticket type?