Fini AI home page
Search...
⌘K
Documentation
Access Fini AI
Access Fini AI
Search...
Navigation
Connect your private data
Zendesk
Documentation
API Reference
Get Started
Introduction
Security
Fini AI Roadmap
Platform Tips
Knowledgebase Tips
Create and Manage a Bot
Ask a Question
Invite Team
Features
Fini Knowledge Items
Fini Analytics
Fini Chat history
Connect your private data
Notion
Confluence
Google Drive
Zendesk
Deploy - Fini integrations
Deploy via API
Fini Widget
Fini Search Bar
Fini Standalone
Chrome Extension
Deploy - External integrations
Slack
Discord
Zendesk
Intercom
Front
HubSpot
Livechat
On this page
Add Zendesk files | Fini
1. Click on Add Knowledge
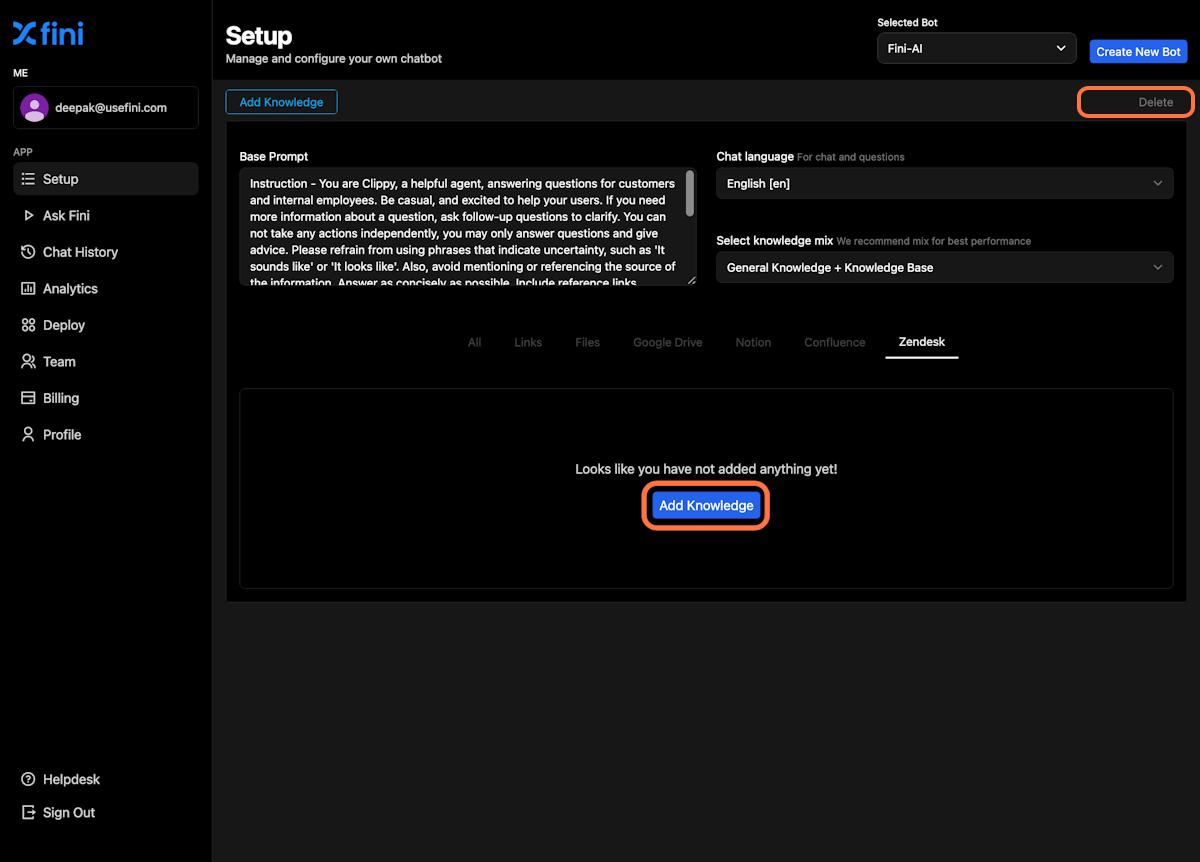
2. Select Zendesk
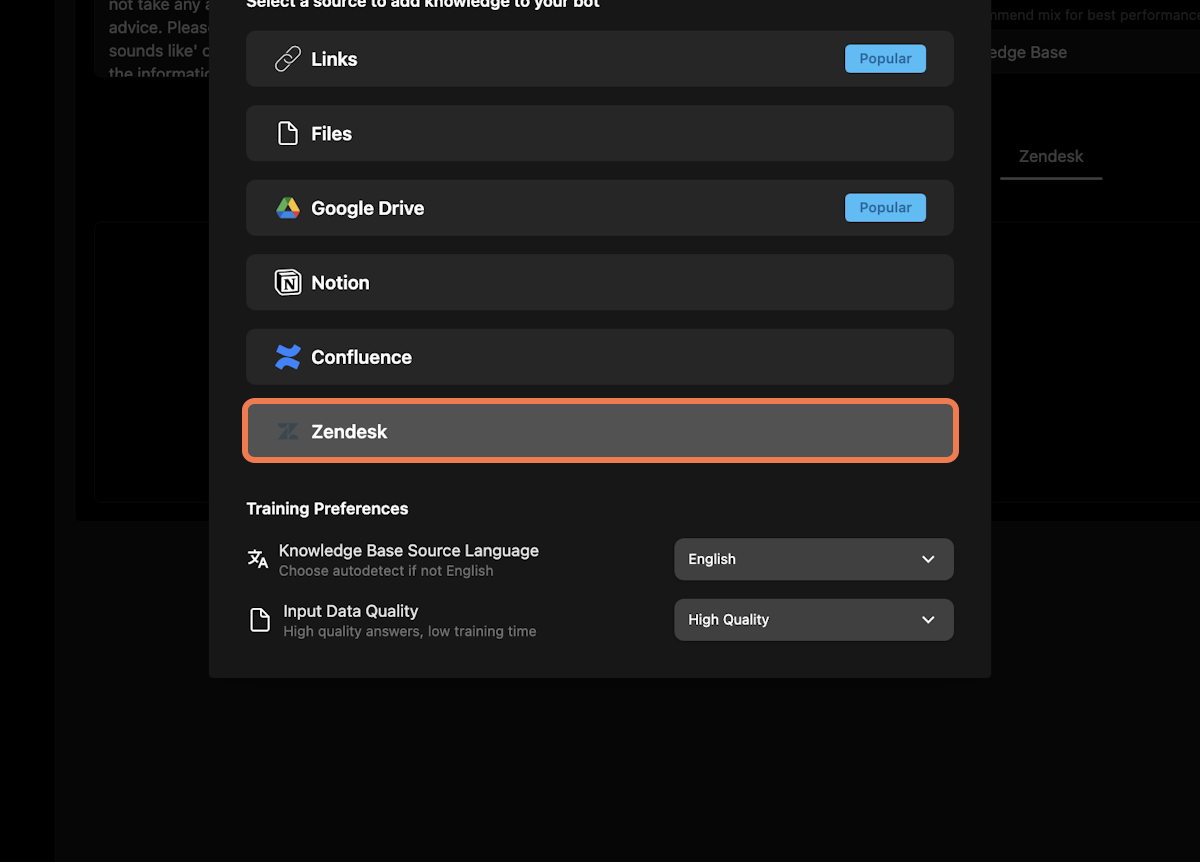
3. Add your subdomain and authorize
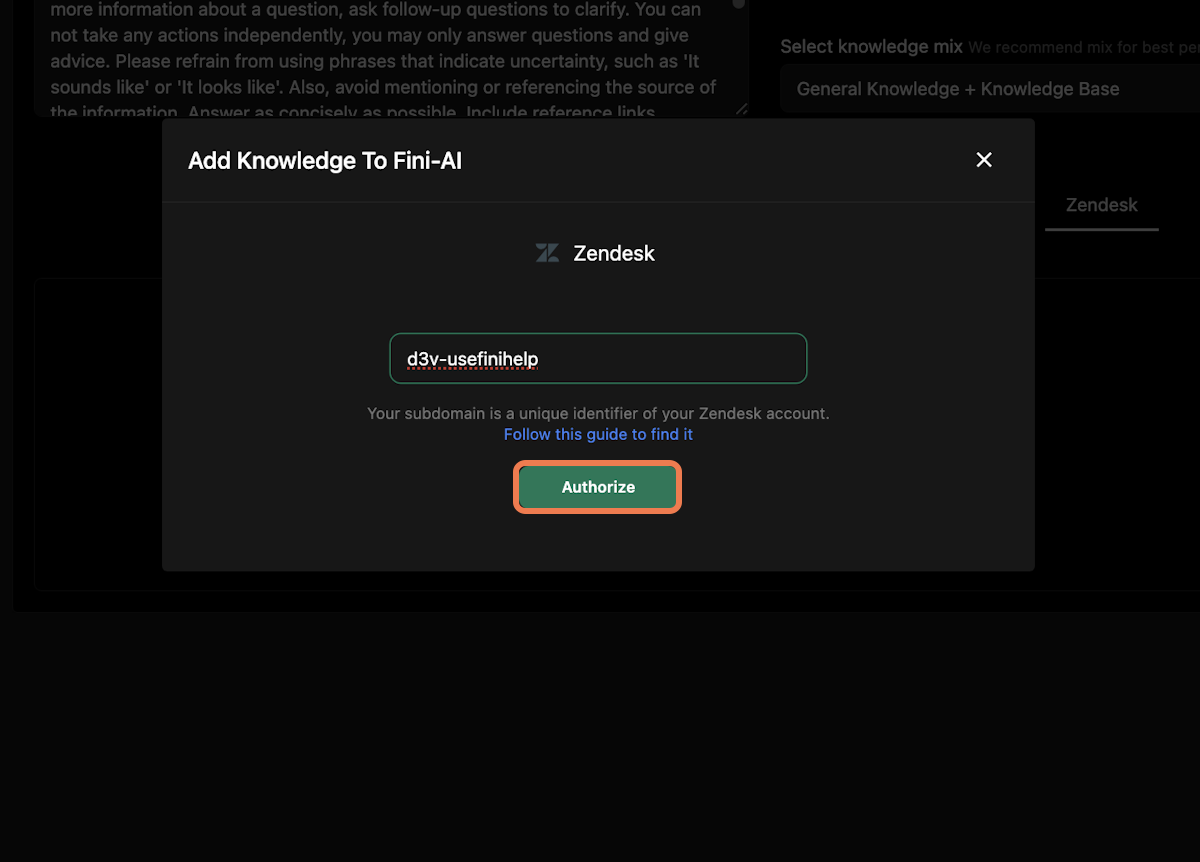
4. Select Category of files you want to add
5. Add files to your bot
6. You are done!
7. Add new Zendesk files
You can return to the app, your Zendesk setup is complete!
Connect your private data
Zendesk
Learn how to add files from Zendesk
Create an account at
Fini AI
to get started
Add Zendesk files | Fini
1. Click on Add Knowledge
2. Select Zendesk
3. Add your subdomain and authorize
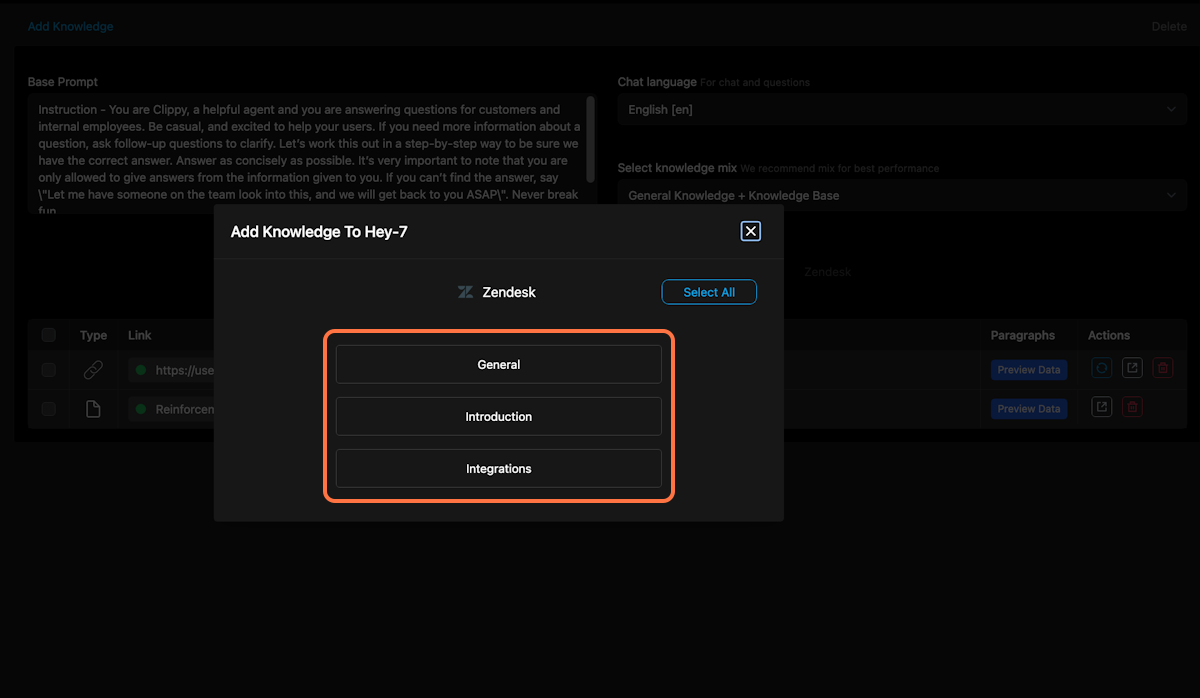
4. Select Category of files you want to add
Note: If you want to add all files, simply choose “Select all”
5. Add files to your bot
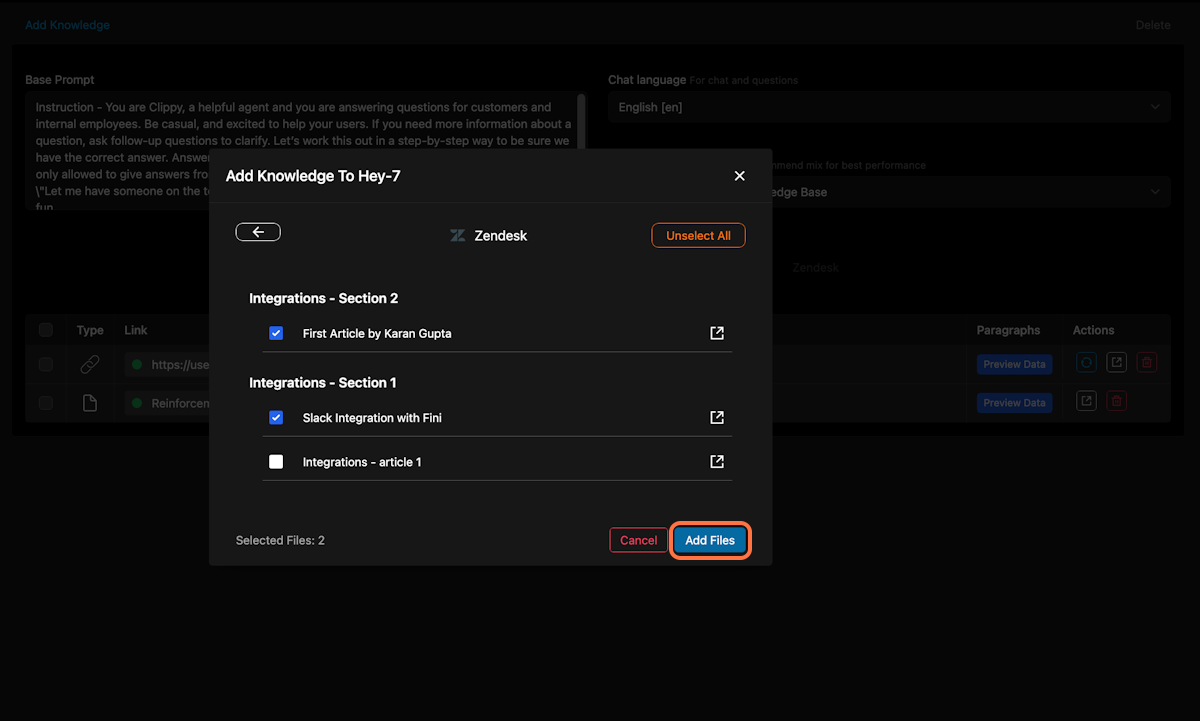
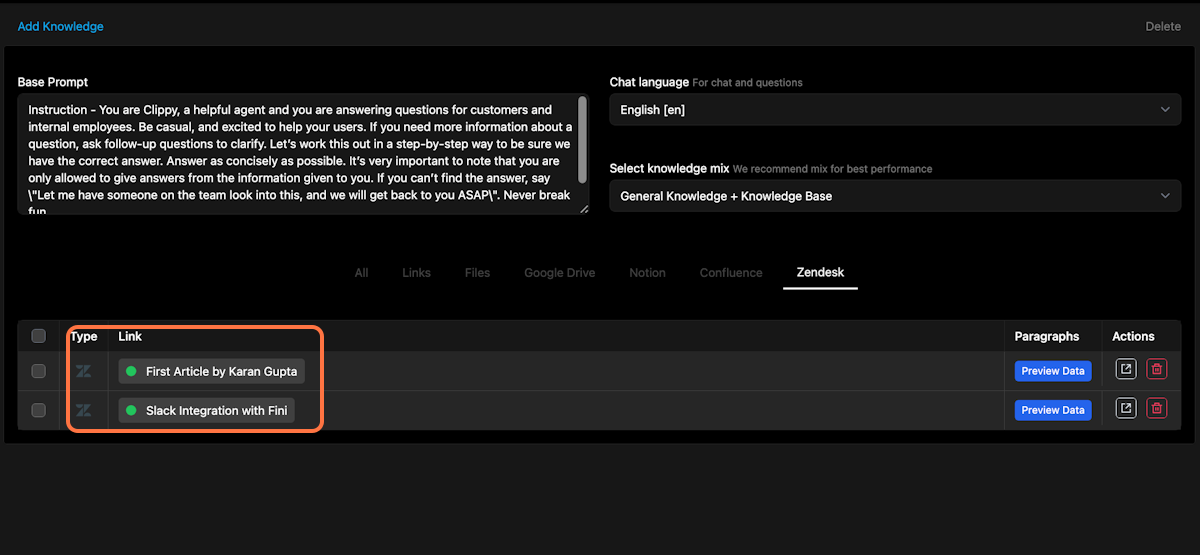
6. You are done!
Your training is complete when there is a “green dot” in front of the file. This signifies that your file has been read successfully. You can also click on “Preview data” to look at the contents
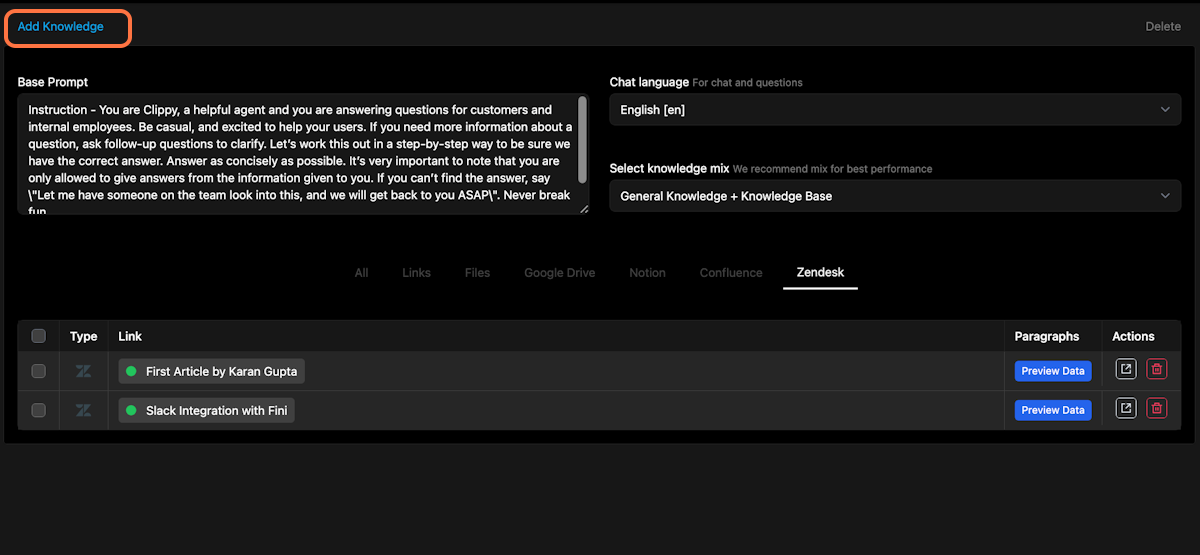
7. Add new Zendesk files
You can click on Add Knowledge and follow the same process to add new Notion files to your bot
You can return to the app, your Zendesk setup is complete!
Google Drive
Deploy via API
Assistant
Responses are generated using AI and may contain mistakes.